PORCELAIN PENDANT PART II - EMBELLISHING
This is how we left the foundation of our pendant. The working thread is exiting from Bead #11 and if we were to continue bringing the thread up to the top bead we would end up working clockwise, which is difficult for me and most right handed people to do. So at this point I flip my work over so that I'm working counter clockwise.
Bring your needle up through the side beads of the last 6 bead circle finished, and exit through the left side of its very top bead.
Pick up 1 of the 3mm crystals, 1 seed bead and 1 crystal.
Pass needle back through the top 4mm round bead.
Travel down through the next 4mm bead to your left.
Pick up 1 crystal and 1 seed bead.
Now pass needle through the 3 mm crystal bead to your right ... remember to go through just the crystal and NOT the seed bead.
Pass needle back through the same 4 mm bead that you just added the new crystal and seed bead to. Again remember we are traveling in a counterclockwise direction.
Basically we will be adding 1 crystal 3 mm bead and 1 seed bead between each of the 4 mm beads in this circle. Pass needle through the next 4 mm bead.
Again pick up 1 crystal 3 mm bead and 1 seed bead and pass needle down through just the crystal bead added previously.
And then back through the 4 mm bead that is at the base of the newly added crystal.
We will continue with this pattern of going through the 4 mm base bead, picking up 1 crystal 3 mm bead and 1 seed bead all around the 6 bead circle until we have 6 crystals and 5 seed beads in place.
Photo below shows the 6th crystal and its seed bead being set into position by going through the crystal to its left.
Photo below shows the needle going through the base 4 mm bead a second time. I should have designated the tip of needle in this photo but trust me, it is to the right, traveling in the accepted counterclockwise direction.
Photo below ... Notice there is a gap between the first crystal added and the very last one that we've just set into place ? We are going to now fix that gap and add our 6th seed bead.
Bring needle up through that very first crystal (the one to your right) and pick up 1 seed bead.
Bring needle down through the last crystal added, the one to your left
And back through the 4 mm base bead.
And up again through that very 1st crystal added.
Now we are going through each of the top 11/0 seed beads ... all 6 of them
Then back through what would have been the 5th seed bead in this "crown"
Pass needle down through the crystal 3 mm bead right below the seed bead that you've just gone through.
We now journey over to the next medium sized circle of 6 beads over to our left by going through the 4 mm base bead from right to left ...
continue over to the next 4 mm base bead, this will be a bead in the large center circle
Now up through the right side bead of that 6 bead circle
And over through the next 2 beads, needle is going from right to left.
we are now in position to make another crystal and seed bead "crown" around the beads of this circle.
It is made just like the previous one by picking up 1 crystal 3mm bead, 1 seed bead and 1 crystal bead. Going back through the top 4 mm bead and then
passing the needle through the 4 mm base bead to the left of the newly added crystal and once again picking up 1 crystal bead and 1 seed bead going back down the previous crystal and back through the 4 mm base bead.
Once 6 crystals have been added along with 5 seed beads there is that familiar gap between the first and the last crystal that needs to be joined.
Pass through the base bead
and up through the very first crystal that was strung on this circle
Pick up 1 seed bead and pass down through the last crystal that was strung
Back through the base bead , from left to right ...
Again up through that 1st crystal ...
We will again go through all of the top seed beads, joining them into a nice tight circle and forming our "crown". Just like the first crown made we will travel back through the 5th top seed bead (the one to the left of the 6th seed bead bridge that was added last).
And then pass through the 4 mm base bead that is part of the large center circle. Following the same path that we did to reach the 2nd 6 bead circle , we will travel over and up to the 3rd 6 bead circle to the top bead and repeat the same steps as we did to make our first 2 crowns.
Complete the crowns on the 3rd and 4th remaining 6 bead circles in the same way as you did the first two.
When 4th crown is complete, travel down the familiar 6th crystal and through the 4 mm base bead to position the thread for making the crown of the large center circle of beads.
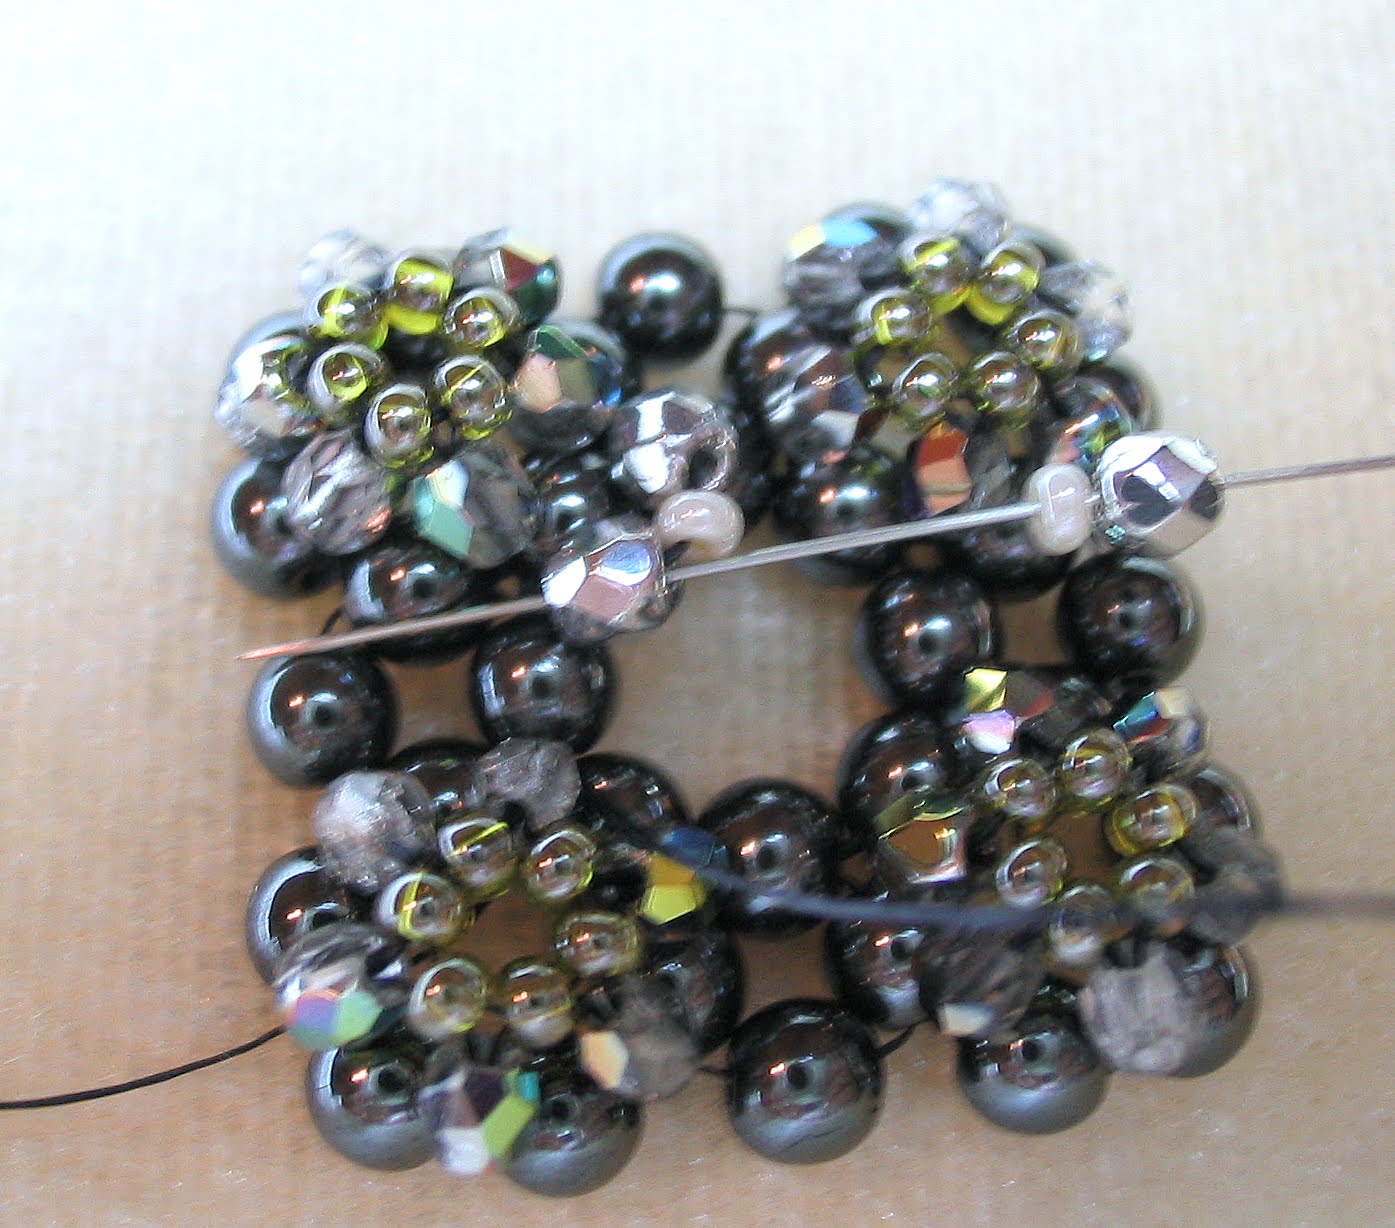
Here you will pick up your contrasting 3mm crystals and seed beads (if this is what you've decided to use) . Like before, pick up 1 crystal, 1 seed bead and 1 crystal and pass needle back through the 4mm base bead.
Pass through the 4 mm base bead to the left of the newly added crystals and, like the other crowns, pick up 1 crystal and 1 seed bead
Travel down through the crystal to your right, again just through the crystal bead and not the seed bead above it.
Pass again through the base 4 mm bead beneath the newly added crystal and then through the 4 mm base bead to the left of it.
Continue with this pattern all around until you have 8 crystals and 7 seed beads in place.
Then just like the smaller crowns, pass through the 4 mm base bead
And up the very first crystal added
Pick up 1 seed bead and go down through the last crystal added
Back through the 4 mm base bead
And up through the first crystal (sorry about the fuzzy photo but I took 3 shots of this and believe me this is the only one that turned out the best ... scary isn't it ?)
Now back through all of the top seed beads, to join the top of the crown together. I sometimes go through them twice to make sure they're secure.
Then back down through one of the crystal beads ( these last few photos were all fuzzy and I haven't figured out if maybe I was getting tired at this point or if my camera was trying to tell me it had had enough and needed to rest)
At this point the pendant is pretty much finished. If the working thread is long enough I normally work it around until I get to a top bead in one of the 6 bead circles and then I use that thread to attach the pendant to my own seed beaded bails. But you could use the thread to attach it to a large closed jumpring or to a metal pendant bail. Once completed all thread tails should be worked securely back into the piece and then cleanly cut so they do not show.